Archive for the ‘Architecture’ Category

Using a Tulikivi Soapstone heater in New England

February 17, 2022

When we were trying to research whether to install our soapstone masonry heater, it was really hard to find any actual information. That was seven years ago, and in that time we have come to really enjoy our Tulikivi. Having said that, it is not the right fit for everyone and I thought it might be helpful to go over the pros and cons so that if anyone out there is considering installing a heater like ours, you might have a little more to go on.

The nuts and bolts: Our house is approximately 1200 square feet, it is well insulated with closed cell foam, however, it is also over 200 years old, so no amount of insulating will match a new home. We live in the white mountains of New Hampshire, average wintertime temperatures range between 15° and 30° F. We also typically get approximately 15-20 days when it is much colder, yesterday, for example,  when I got up it was 2° outside.

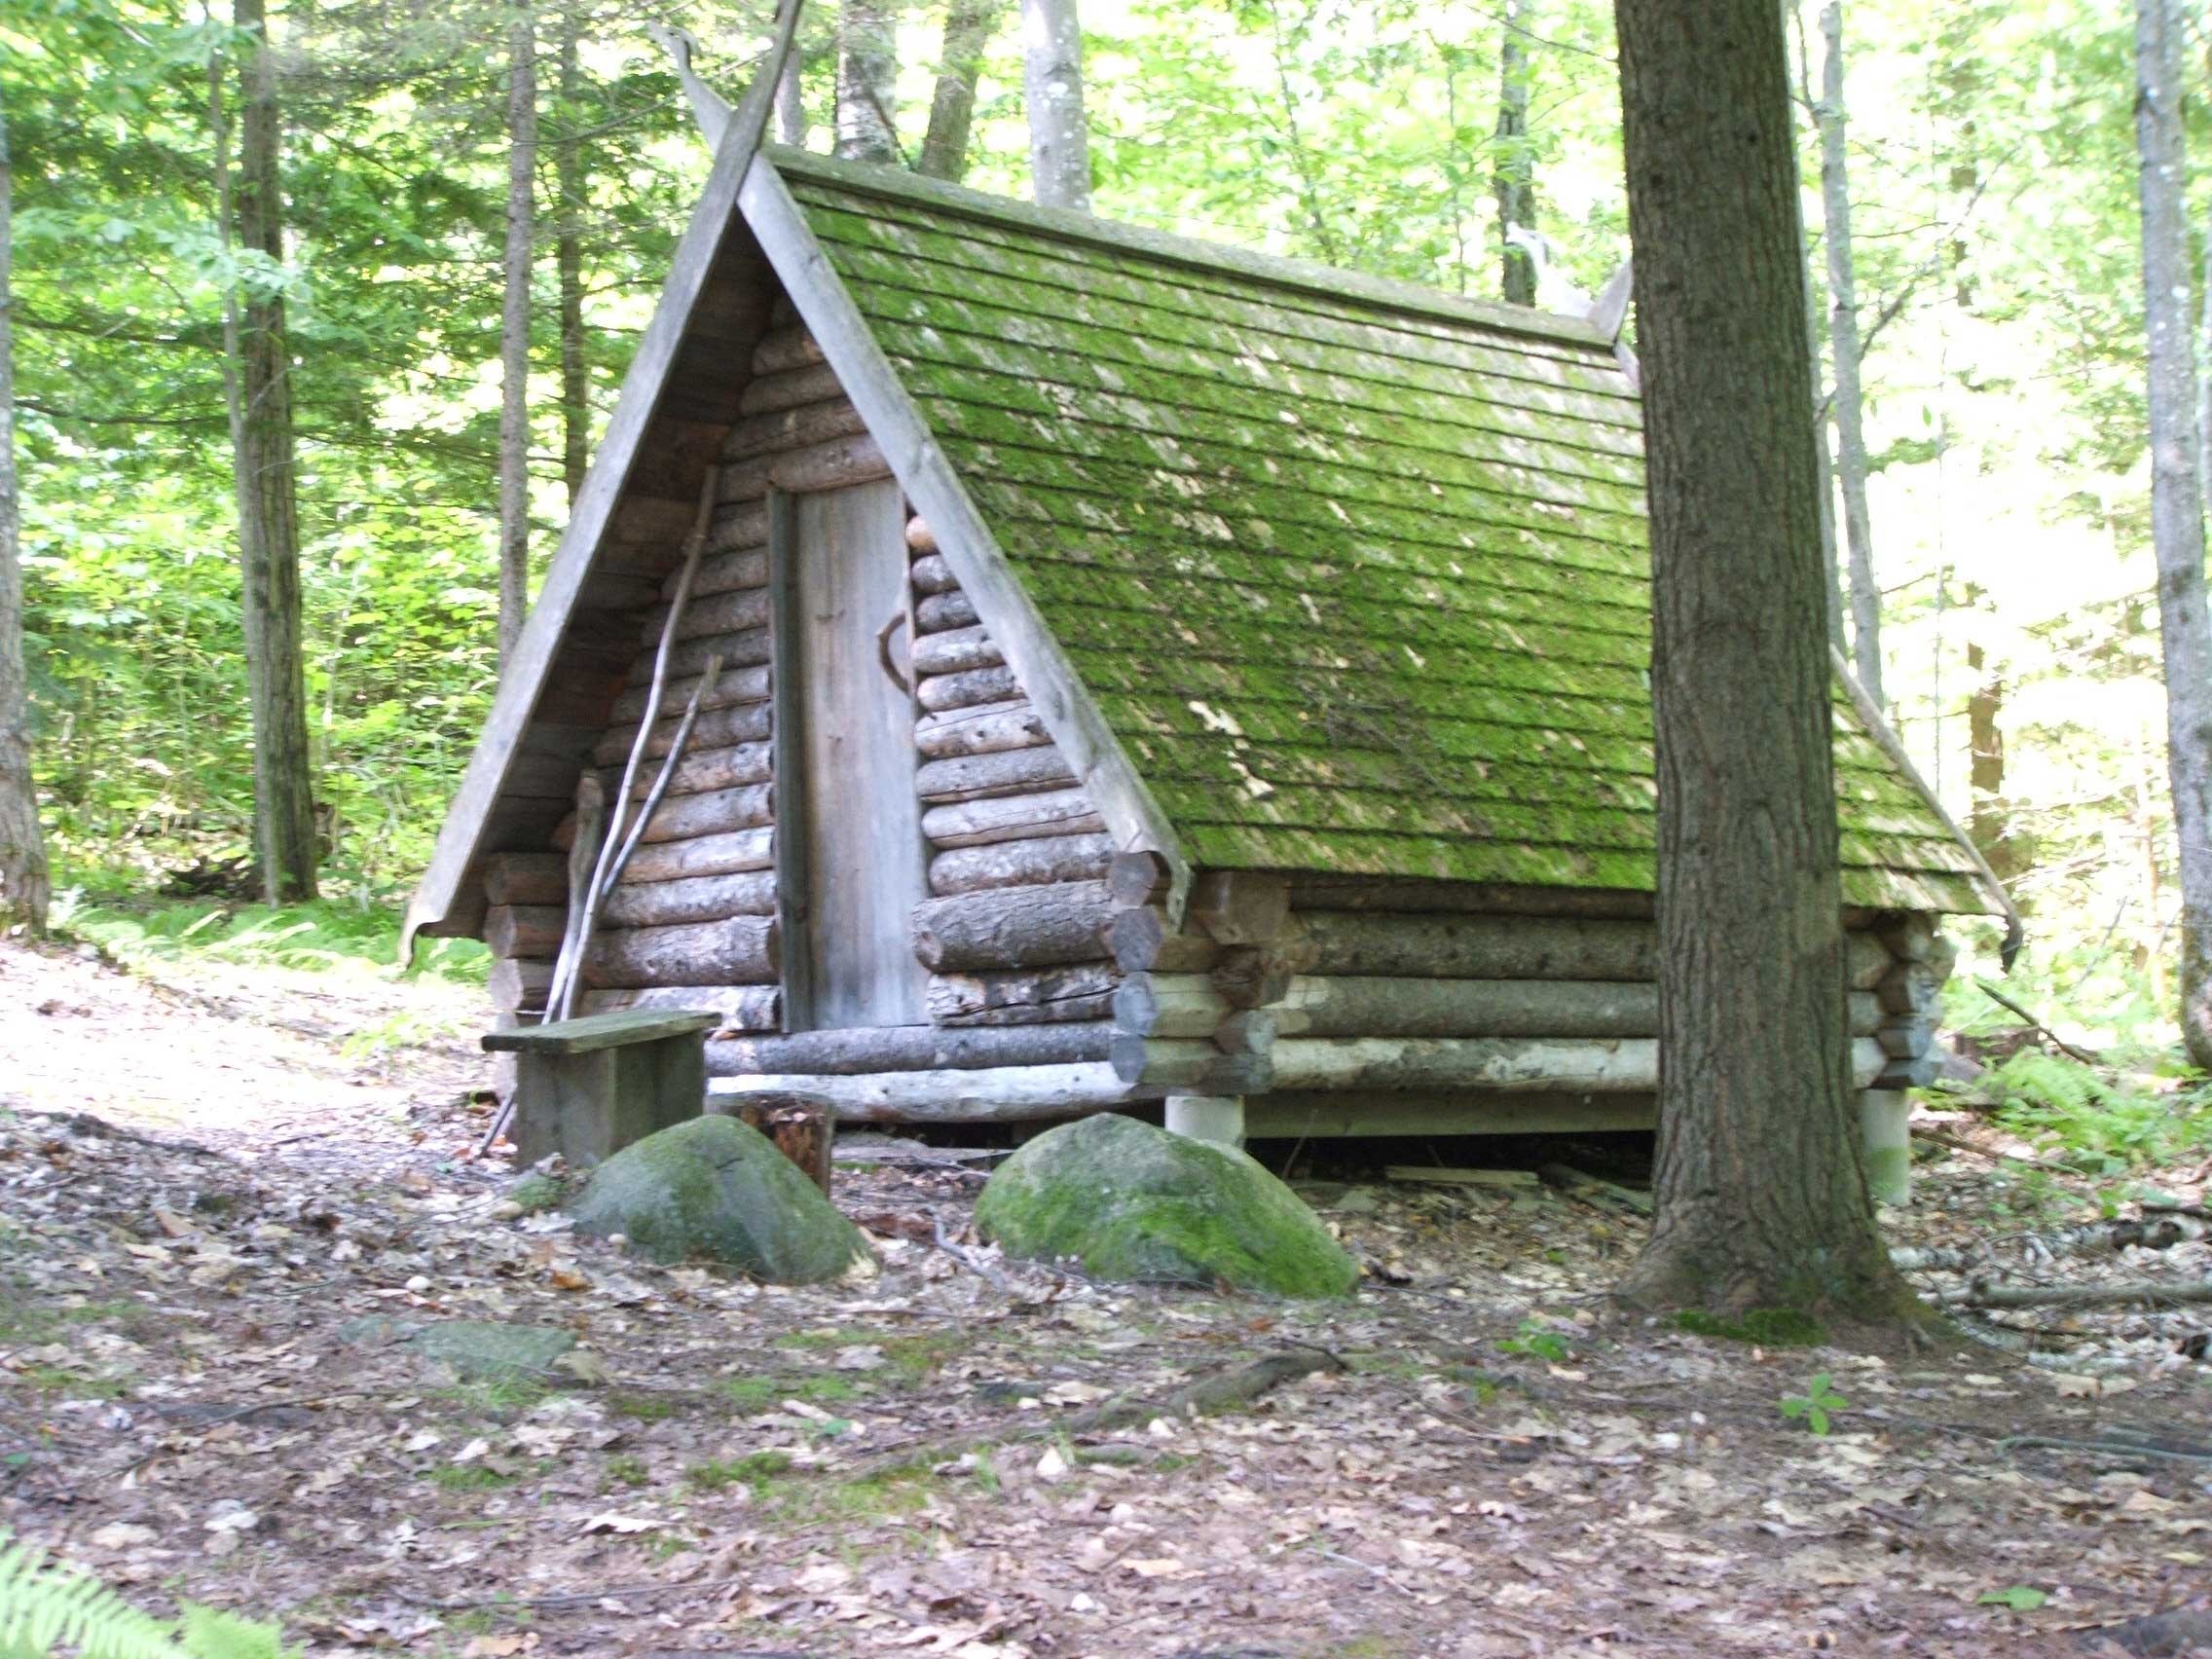
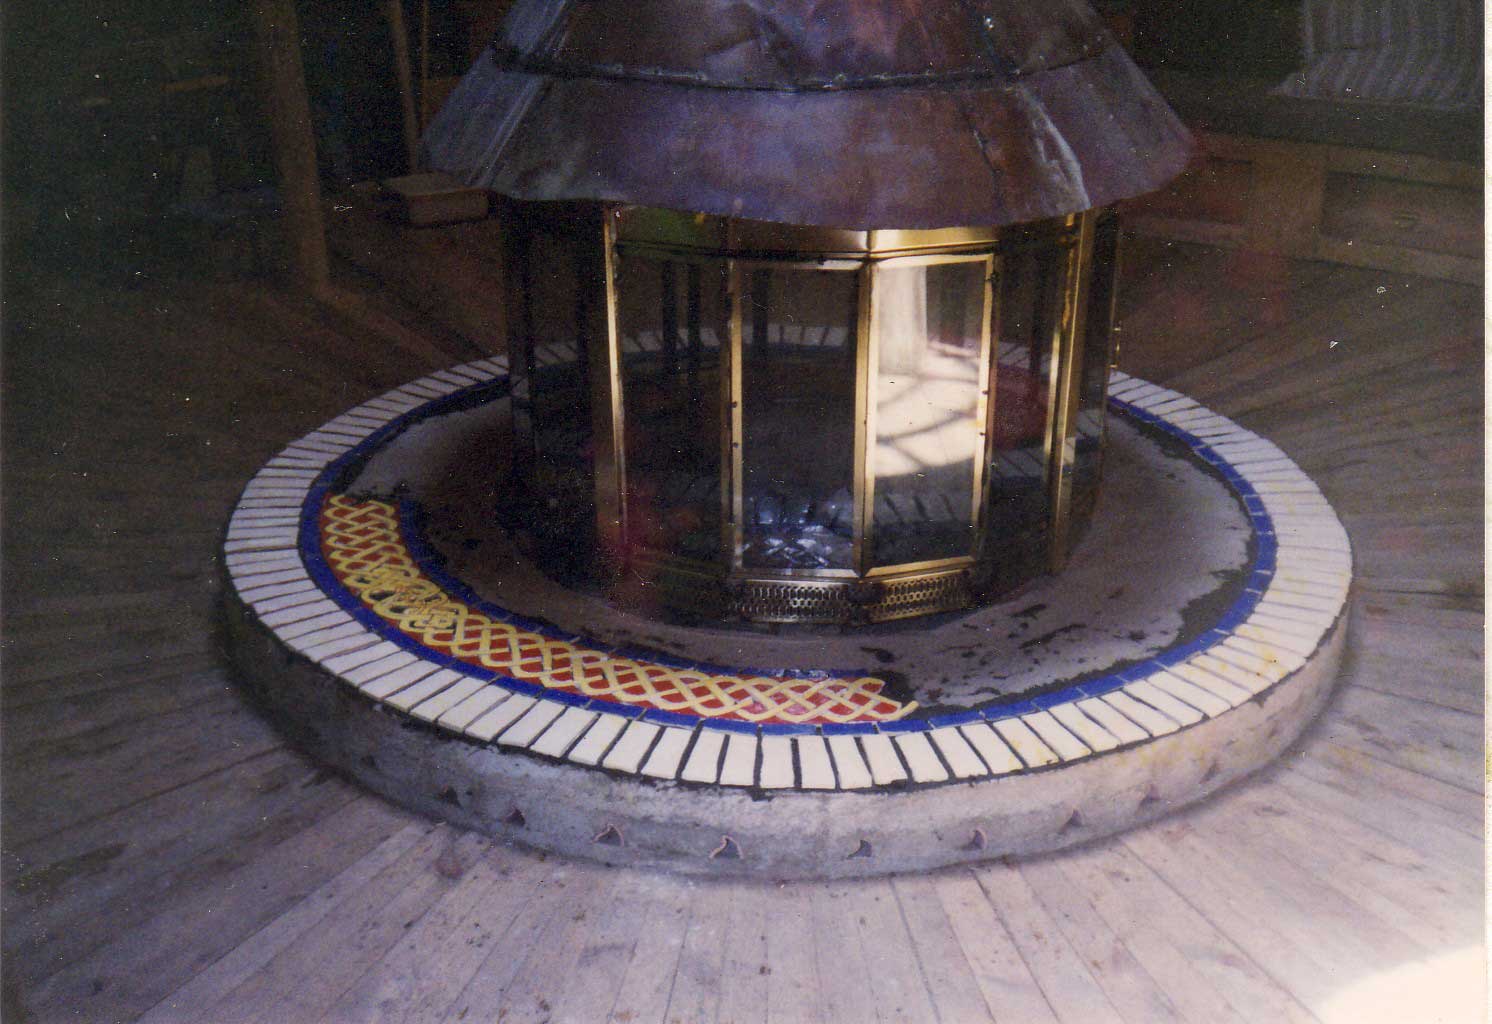
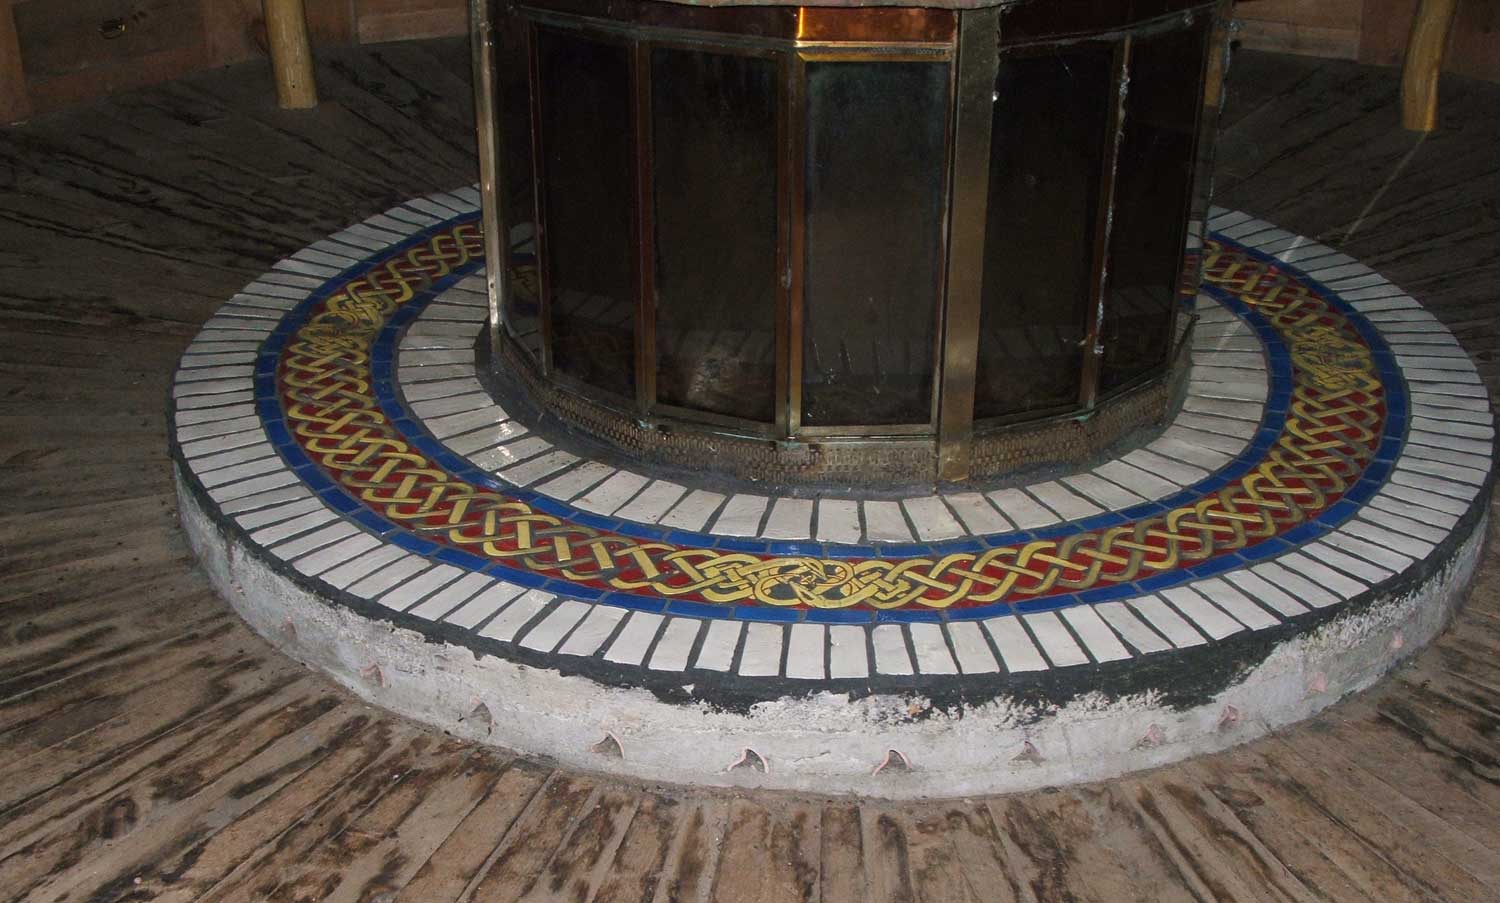
What we installed; a Tulikivi four chamber heater that weighs 5000 pounds and can handle a maximum wood burn of 40 lbs in 12 hours.

So what are the advantages and disadvantages?

Lets start with the advantages:

-The stove is lit twice a day for relatively fast burns and then is shut down. Unlike a woodstove it does not have to be continually tended and unlike a woodstove you don’t get huge fluctuations in heat. Instead you get a steady radiant heat for 12 hours after each burn.

-The surface of the heater stays at a relatively constant temperature throughout the day varying from 90° to 120° F, depending on the part of the heater and the time of the day. So, with the exception of the metal and glass door, the surfaces are safe to the touch. This also means you can close the heater down after the morning burn and leave the house for the day knowing you have a safe source of constant heat.

-The way the heater operates results in a very complete burn including combustion of gasses that would normally end up in the atmosphere from a conventional woodstove. In fact the burn is so complete and efficient that it is considered a “green” heating source and at the time that we installed the heater we got a serious tax break for converting to green energy. The completeness of the burn also means that very little ash is produced, perhaps a gallon-and-a-half per week at the height of winter. The amount of soot produced in the chimney and burn chambers is almost insignificant. We do clean the chimney and burn chambers once a year in the fall but it takes about an hour and produces very little in the way of ash and almost no creosote at all.

-Because of both the efficiency of the burn and the fact that the heater does not have to be fed all day long, it burns less wood than a conventional wood stove. We burn between three and three-and-a-half cords of wood per year.

-The Tulikivi soapstone heater was developed in Finland and Scandinavia over several centuries of trial and error. The reason that is significant is that because of the scarcity of hardwoods and the high value of the hardwoods that do grow in that meant there was a reluctance to burn hardwoods for heat unless the wood was already determined to be scrap or not high enough quality for construction, furniture, or boatbuilding. Consequentially, the heater was developed to burn any kind of wood, hardwood or softwood, so long as it is dry. So, it is safe to burn any kind of wood with no adverse affects to the heater. This is not the case with all masonry heaters.

-Because of the high temperature of the burns and the fact that the heater is only lit twice a day, you don’t end up with the smoke in your house that often results from having to open the wood stove many times a day with a smoldering fire. In fact Allergists recommend masonry heaters for many patients who heat with wood for just that reason.

-Lastly, it is beautiful. The soapstone is smooth to the touch, visitors often can’t help but caress our heater, it is easy to keep clean, the roaring fire morning and night is something that brings great enjoyment and literal warmth to the home.

So what are the drawbacks of this heater?

-First off is the price. You can expect to spend three to four times as much for a Tulikivi heater than for a new woodstove. That puts a lot of people off right there.

-Second is the size of the heater. Ours is 6 feet high, 3.4 feet wide, and 2.5 feet deep, and that is considered to be a relatively small heater since we have a small home.

The weight of the heater required that I build a foundation under the floors to take the weight, which is an additional cost.

-Third is the wood itself. It must be dry, and that does not mean what feels dry, it means wood that has been properly dried for at least a year. This is the part that too many people don’t factor in. You need to be cutting, splitting and storing wood at least a year in advance, which means space to store and dry that wood. We may only burn three cords of wood a year but have enough roofed storage for seven cords of wood in two sheds, this year’s wood in one shed and next year’s wood in another.

Two woodsheds, one for this year’s wood and one drying next year’s wood.

-While we are talking about wood, it is true that you can burn any kind of wood but the species still matters. The BTUs produced burning wood varies a lot from species to species. This is why the quantity of the burn is measured in weight not volume; 40 pounds of white pine is a lot more wood than 40 pounds of ash. Furthermore, different species of wood dry at different rates, for example ash can be completely dry in ten months after it has been cut and split and stored properly. Red Oak on the other hand takes two full years to completely dry. Yet a further drawback is the size of the pieces. In order to get short, hot burns the individual pieces of wood need to be small, 12 to 14 inches in length and not much bigger around than your forearm. If you are cutting and splitting your own wood, that means much more work, if you are purchasing wood, it may be harder to find someone willing to cut and split to the size you need, or you may have to pay more per cord. One last thing on wood, since you need to start a fresh fire morning and night, you need to have a ready and significant supply of kindling.

-Tools and time. If you are going to cut and split your own wood, you need to have the tools to do so. Those will cost money. We are lucky in that a neighbor loans us his commercial chipper to clean up after taking down trees. All he asks is that we supply the fuel for the chipper. Dealing with the branches and the mess of taking down trees is not something many people think enough about and frankly, I find that it is the worst part of harvesting firewood.

-Schedule. This is important; you can’t randomly fire up the heater, or fire it up when you are cold. Burns need to be 12 hours apart, minimum. That means firing up the heater at roughly the same time every morning in cold weather and then again twelve hours later. This may not sound like a big deal, but if you don’t get up every morning at roughly the same time, like to sleep in hours later on a weekend for example, it can really cause problems. The same is true in the evenings, if you like to go out a lot you either have to schedule around burn times, or this kind of heat won’t work for you.

-Temperature control; this is another of those things that is both and advantage and a drawback at the same time. The heat that is produced is a steady predictable heat, but you can’t just turn it up. If you calculate the size of your heater correctly, you will find that most of the time a simple two burns a day will keep your home comfortable, in the fall and the spring, you may even find that one burn a day will prove adequate to keep your home comfortable. However, if you live in an area where you have sudden deep drops in temperature, as we do, you will not be able to get more heat out of the Tulikivi by making bigger burns.  Burning more than the maximum amount of recommended wood per burn simply puts more heat up the chimney, not into the house and you can damage the heater. All of this means you need to have a second heat source. Another wood stove, propane heater, electric heat, or oil heat, for those days that the temperature really drops. This is also true if you live in a place where there is a month or two a year where the temperature can vary a lot in spring and summer. The soapstone heater takes almost twelve hours to reach temperature when it has not been lit in a while, so you are not going to get instant heat. We have days in the fall and spring when it can be 70° at midday, but 35° that same night, having a way to rapidly compensate for extreme temperature shifts becomes an important part of your overall heating plan.

Given all the drawbacks, you might be wondering why anybody would want to install this kind of heater. The answer to that essentially comes down to lifestyle. Obviously this isn’t going to be a good solution for most city dwellers, or for people who’s work hours vary a lot. For us though, it has been a good match. We live in a rural area, have property that had become heavily overgrown when we took it on, so, careful select cutting of trees each year on different parts of the property has actually improved the forest health and most of our fuel comes from our own land.  That wood is not free though, it takes time to harvest, cut, split, stack and move. On the other hand, those are all activities that I pretty much enjoy and I would much rather do than go to a gym.  (To give you some reference; our best estimate after heating this way for seven seasons is that we spend between 48 and 50 hours a year harvesting, cutting, splitting, and stacking wood).

I really like the seasonal shifts that take us through harvesting, stacking, and burning of our own fuel. We like that most of our heat each winter does not involve fossil fuel, although, between the chipper and chain saw we do consume about ten gallons of gasoline a year. We like that our fuel is renewable, even on our own land. We like being home in the evenings, and I an a habitual early riser, getting up and lighting the fire to me is just like making the coffee, part of getting up in the winter. The other issues that pointed us in this direction for heat are that we do not have dry basement space to install an oil furnace, and even if we did, the cost of that installation, the ducting or piping to heat the house all add up to more than what we paid for our soapstone heater. There is no natural gas available in our area, propane is expensive, and in all three instances we would be dependent on fossil fuels that come to us from far away. For us, given our lifestyle, where we live, and how we like to spend our time, this was a good choice, and one we have never regretted, but it is not for everybody.

So if you are considering a masonry heater, or a Tulikivi in particular, I hope this was helpful.

A long overdue update:

September 6, 2016

The last post was about children’s gifts for Christmas 2014, since then a lot has been going on.

2015

First the fleet; we built a new sail for the launch and finished a new solid mast for the Penny Fee the winter of 2015. Both worked out well until we cracked the new mast at the partners (on one of the last weekends of the season). It would appear that a flaw in the wood and the smallness of the opening in the deck combined in the worst possible way. So this spring we built a new mast (our third) and redesigned both the foredeck and mast step. So far the results have been good.

Our Friendship sloop also got some attention in the spring of 2015. In addition to the usual painting and maintenance, we had discovered rot in the covering boards over the transom. This is an area known to have problems in any boat with an elliptical transom so we were not overly surprised. The actual rot was not very extensive and limited to the covering boards themselves where the end grain was most exposed to the elements. The new white oak for the replacement covering boards was not too costly, but the work dictated the removal of the toe-rails aft and the bulwarks which was both time consuming and a little painful since both jobs involved removing sound wood that looked great and would only have to be put back together later. This is the kind of job that I am not fond of since when you are done, if you have done a proper job, no one will know that you have done anything at all…well our surveyor knows since he got a look at the finished job, and I guess that’s a good thing.

bohselxk95ryd3mr6qtbmx8uomegivgu

New covering boards

Anyway the fleet went into the water in mid June.

While we were working on the fleet we were also setting in motion a building campaign that has been in the planning stages for five years.

The cottage where the woman who will willingly get up in the middle of the night and take the anchor watch and I live and that is owned by the two tortoiseshell cats has been in sore need of attention for some time. Difficult to heat, limited in space, poorly insulated, and with dodgy plumbing, it is nonetheless a beautiful old classic cottage dating from the late 18th century. In fact it is one of the oldest houses in the area. We have been working on a design that would allow us to add some space, replace plumbing, and some wiring, as well as better insulate and add both a soapstone heater, and new wood stove.

We started this project in the spring of 2015 knowing that the summer would be too busy to commit much time to the project (we were right about that) but, being in the mountains of New Hampshire, there is never a good way to know what will happen when you start digging for a new foundation, even a small one. If we hit solid granite we knew we would need time to reconsider the design, thus we broke ground a full three months before we actually intended to start construction.

Fortunately, we did not hit ledge and things went so smoothly (despite busted water main) that we were able to get the foundation and the new septic line in and finished before the summer really got going.

4985yyeixjytq0p86azot5qbrcf8v5wa

Foundation in and covered for summer

With the new foundation in the ground and covered with a tarp, the boats splashed and we made ready for a cruise to Mount Desert Island and back with friends.
Two weeks in July that were a total time out. We cruised with three other Friendships and a retired commodore who had owned two Friendships himself but has now progressed to a handsome lobster yacht, much easier to manage for an older solo mariner.

Pretty much everywhere we went we met with warm welcomes and safe moorings or dockage.

ey9pxe7vjn2cjj46zak1sct78ol46fag

In September the building project got underway in earnest and has dominated our lives since then. The actual addition went up quite quickly, but since we were doing almost all the work ourselves, it was also exhausting. We were under cover and closed in from the weather by the beginning of November, and then shifted to working on interior spaces.

jxc7v9dkwqsa4l9s739nil6kfwgknpuv

We spent most of the winter learning to use the new soapstone Tulikivi heater. Thankfully we had some expert help with that.

qz58tpudyi717070bgfedghbhr7clind

2016

As we entered 2016 we were still working on interior construction of the addition, as well as replacing some worn out furniture. A new dining table of white oak, some built in benches, and at least the start of more cabinets to augment the minimal kitchen storage that we have.

The boat projects this spring included the replacing of a bulkhead that had been getting soft in the cockpit, and the mounting of a bronze windlass that should make retrieving the anchor easier. There was also the yearly painting, varnishing, and bottom paint.

We put the fleet in the water about a week earlier than usual, and between keeping the fleet up to scratch and working on the cottage it has left time for little else….

The Fleet Is In

September 28, 2012

After what seems like the busiest summer yet, our fleet is home again and we are starting the chores to get all of our boats ready for winter. This includes fresh bottom paint, winterizing the diesel on the Friendship Sloop, cleaning and stowing sails, cushions, pillows, and mattresses, packing up the galley, and most importantly making lists of repairs that need to be done over the winter.

Typically, once the boats are bedded down for winter, they are allowed to rest for at least a couple of months while we focus on the autumn chores  at the cottage,  and then the winter holidays. Come January and February, though, I know I will start thinking about winter boat projects that need to be done before spring-cleaning and painting begins in earnest. Having made a list in the fall saves time and helps push the process along.

When we built the shed it seemed huge—much larger than it needed to be—and I remember wondering if we had not gotten a bit carried away. Now, twelve years later, part of the autumnal ritual of putting the boats to bed is the process of figuring out how to get everything into the building and still leave enough room to move around.

I know I will enjoy puttering on projects in the boat shed over the next six months, almost as much as I enjoy being on the water. And there is something very satisfying about putting all the bits and pieces away, making sure everything is tagged or labeled, sometimes adding a shelf or box somewhere in the shed so that another piece of gear can have a better place to winter over. Like stacking firewood, the process of putting things away, brings a sense of order to what is usually a frantic end-of-season rush, and a knowledge that I will benefit later from the work I do now.

For the moment though I am taking a deep breath and savoring the fact that the boats ate all back safe and sound in the boat shed.

The leaves have begun to change colors, the equinox has come and gone, the boats are in the shed: autumn is here.

Tree house

February 11, 2009

I have not written about my friend Peter’s tree house in a while so I thought I would add a post here. One of the best things about writing a book about the tree house while building it is: rationalization. That’s right rationalization.

Tree House in Winter

Tree House in Winter

The whole process of building a tree house as an adult is not practical and not rational. Kids never asked why we were building a tree house; it was obvious. But adults would start right away with the questions of doom and gloom: what if the tree dies? What if it gets struck by lightning? How much time is this going to take? How much is this going to cost? All questions that no self-respecting child would concern themselves with. In this kind of questioning environment it became difficult to pursue the kind of neat, and pointless, extravagances that, in essence, define a tree house. That is where the book comes in. There were many instances, the folding staircase, and the custom chess set, to name only two, that would have been a difficult sell to most adults except: “It will add so much to the book”.

Yes “the book” became the rationalization for all kinds of excess: the water-clock, the retractable desk, windows that look out only on the tree-trunk, an elaborate door locking mechanism concealed in….well I am not at liberty to divulge that. These elements, which were in many ways some of the most fun parts of building the tree house, would most likely not have been included in the project had it not been that we could rationalize them; “for the book”.

The truth is, this was about doing something fun that had been a life-long dream of Peter’s. Wouldn’t it have been nice to not have to find rationality for it? Anyway, it got me thinking, maybe someone should write a beautifully illustrated book on renewable energy, or affordable heath-care, or holding government accountable. Then when people whine and ask; why we have to do this, we can just tell them. It’s for the book.

So many people have found this site by searching the word treehouse or the words tree house that I wanted to create a page for tree house stuff.

If you click Tree House Page at the right, you will go to a new page with some older posts on tree houses and some new material as well. Enjoy!

Doll House Furniture

November 7, 2008

Since we are fast approaching toy making season, I thought I would spend some time on ideas for personalized toys. One type of toy that can be easily personalized is a dollhouse.

My Niece has a dollhouse that was originally built by her great-Grandfather. He built it for his little girl who would eventually become my Mother. My Mother passed the dollhouse on to her little girl, my sister, who eventually passed it on to her little girl, my niece. The family history related to the dollhouse is visible when one looks inside. Hanging on the walls are small reproductions of photographs that include a picture of the original builder of the dollhouse, my Grandfather, there is also a picture of me as a teenager because I helped with the renovation of the dollhouse before it was given to my sister. There is a picture of my Mother taken when she was a child, and for whom the dollhouse was originally intended.

Picture of my mother for whom the dollhouse was originally built. A smaller version of this picture is in the dollhouse.

Picture of my mother for whom the dollhouse was originally built. A smaller version of this picture is in the dollhouse.

There are also pictures that may not mean a lot to the casual visitor, but that mean something special to my sister and my niece. For example, there is a real house on Long Island Sound that, since the late 1950s, my family has returned to again and again. For us, this house was the embodiment of summer. Hanging in the living room is a once magnificent print entitled La Siren. Three generations of my family have grown up with it and it figures prominently in family legend. And, as you might have guessed, a small reproduction of La Siren hangs in the living room of my niece’s dollhouse.

It is easy to make personalized art for a dollhouse using a personal computer. A scan of a family photograph or a digital photograph of a real painting or print can be reproduced at the appropriate scale for a dollhouse using a computer printer.  Use the glossy photo paper made for computer printers and make sure the settings for the printer are set at either “photo” or “best”. Because the size of the print will be small you will not use vast amounts of printer ink, but be sure to return your printer settings to where they were when you are done.

Making a frame for the picture can be as simple a buying a very small picture frame and then making your print match in size, or, what I do is to make a long strip of miniature molding using a strip of balsa wood and sandpaper. Next, I cut the molding to the desired lengths to make a frame with an X-acto knife. Then, I either glue the frame right to the picture, or cover your print with a piece of heavy gauge clear plastic, or even thin plexi-glass or acrylic.

I have friends (mostly grown women) who spend a lot of time trying to find doll furniture that matches the real furniture that they own. I even have one friend who had her husband build an elaborate miniature version of her dollhouse to put in the dollhouse. I think making your own personalized artwork is much easier.

A hurricane and other minor distractions

October 8, 2008

The month of September was a very real trial. Between trying to get the roof of the Celtic wheelhouse finished, which consumed most of the best sailing weather, sweating over whether hurricane Kyle was going to pay us a visit on the coast, I am just glad that October is here. There is still a lot to do, the boat will be hauled some time in the next week and still needs to be de-commissioned and winterized, but the tension of the last week has abated. Moreover, the explosion of color that signals the arrival of Autumn has begun and it brings with it an almost instinctual need to prepare for the coming winter.

Finished Roof Celtic Wheelhouse

Boat Shed with Autumn colors

Boat Shed with Autumn colors

              Like the animals that are storing food, I find that the shorter days, colder nights and the chaos of color around me have triggered some primordial desire to stack wood, hang storm windows, and get the coal into the basement. I am even looking forward to washing sails before putting them away for winter. In the meantime, back to the firewood pile…

More Cedar Roof

September 19, 2008

Re-shingling

Re-shingling

There have been numerous distractions here and on the sea as well. A fantastic week cruising on the Friendship Sloop in August was followed by tropical storm Hannah, which had the unfortunate consequence of canceling the Traditional Classic Boat show and postponing the Short Ships regatta at Atlantic Challenge. The storm also interrupted the progress on the new cedar roof for the Celtic Wheelhouse.
                Where we are now: I have stripped the old cedar, which took several days, and have begun re-shingling. The smell of the cedar is wonderful and the work itself, though physically demanding, has a certain calm, rhythmic quality about it. The most demanding part of the work is the planning. Each shingle needs to be tapered specific to the spot where it is placed. The most frustrating part of this job is the damp. We have had so much rain here this summer that getting the shingles to dry enough to put up has taken far longer than the actual shingling. So, much to my chagrin, this job is taking much longer than it did the first time I shingled the roof, nineteen years ago.

drying shingles

drying shingles

Cedar Roof

August 19, 2008

The wheelhouse is based on a very old design that was in evidence in many parts of Europe in pre-Roman times. The common form of roofing that was used at that time was thatch. Because good thatch is a material difficult to get in New England, I chose to use cedar shingles instead. Since cedar shingles can be easily tapered with knife or bock plane, they are a good choice for a conical roof. They also have a primitive organic look, and indeed, have been in use as roofing for nearly as long as thatch. However, in 1990, when I completed the wheelhouse, getting decent cedar shingles proved to be almost as difficult as trying to find a source for thatch.
              After doing a lot of research, I ended up using a white cedar shingle that was of a lower quality than I would have liked because it was all I could afford, and it was all I could get. The finished roof was beautiful, however, and complimented the design of the building well, but the cedar has aged poorly and now it is time for the shingles to be replaced.

The old shingles need to be replaced

The old shingles need to be replaced

              The roof of the tool shed is in even worse shape because it has been overshadowed by a huge hemlock and does not get as much air or sun.

close up of tool shed roof

close up of tool shed roof

tool shed roof

tool shed roof

              A lot has changed since 1990. One thing that has changed is that the average person can access a global market though the internet. It came as a surprise to me that I could now buy a much higher quality shingle directly from a mill in British Columbia for less money than I spent on the roof in 1990. Even given the outrageous cost of shipping, there was simply no comparison. I could buy a much better product, directly from the manufacturer, skip the middleman, and pay less. That is the good news.
              The bad news is that since 1990 the construction world appears to have become obsessed with  power tools. When I went to buy the nails for the actual shingling, they proved to be hard to find. Several big-box-home centers have moved to town since the 90’s. Some of their sales people seemed to have some difficulty grasping the concept of a nail that is not driven by a pneumatic tool. One salesman, when I explained that I did not have a pneumatic nail gun, or compressor, assured me that was no problem, he could sell me one. When I explained that I had no desire to buy a nail gun and compressor because I already own several hammers, he clearly had difficulty understanding what I was saying. When I further explained that there is road going into the building that I am working on, and that there is no electricity, he went away and had a nervous breakdown.
              Fortunately, there is a small building supply company, not too far away, which has been run by the same family for several generations. I walked in:
              “Hey Mark, any chance you have 5d hot-dip nails?”
              “Sure Ted, 5lb, 25lb, or 50lb box?”
              “50lb.”
              “No problem. Middle building out back.”
              Of course, they also sell hammers at this place, so clearly they knew about nails.

New shingles, stacked and ready for dry weather

New shingles, stacked and ready for dry weather


              The next step will be to find a window of five or six days when the weather forecast is not for rain…we have not had that since May…but perhaps in September.

“New House Rules”

April 23, 2008

I have been sanding the bottom of the boat, pumping basements, and repairing stuff damaged by the weight of this winter’s record snows. I did want to take a moment to recommend another blog that might be of interest to anyone who is either about to build a home or is considering building a home.
          Friend Tedd Benson, of Bensonwood Homes, has set up a blog site called New House Rules. It is really worth checking out. Tedd wrote the introduction for our tree house book Treehouse Chronicles, and at the time gave us a fantastic tour of the Bensonwood facility in southern New Hampshire. I was deeply impressed by the commitment to efficiency and to sustainability. Check it out. New House Rules

Handmade Hearth Tiles

March 25, 2008

Last week I had an open house at the wheelhouse for the class of EMT students that was at SOLO. The tiled hearth at the center of the wheelhouse drew a lot of attention, as it often does, so I thought it would make good fodder for a post.
             The base of the hearth is poured concrete and I wanted to cover the concrete with something attractive, washable, and durable.
             A friend who is a potter suggested designing and making tiles for the round hearth. I came up with several designs but the only one I really liked involved making more than six hundred tiles. At first, this was too much to contemplate. What I eventually did was break down the pattern into twelve tile shapes. I made a pattern for each tile shape and assigned each a number. I made a poster-board showing how many tiles of each pattern needed to be made (with a few extra to account for breakage), got the clay all prepared, set up a production area in the shop that I was using at the time, and invited a bunch of friends over for a tile making party.

Tile pattern

             The party was a much greater success than I expected. We actually made all the tiles in one afternoon. The tiles are made of stoneware. The prepared blocks of clay were set up to cut tile slabs with a wire ¼ inch thick.
             The process went like this; the slab of what will become tile is cut and placed with what will be the top side down. The back of the tile is scored lightly with a toothed trowel to take the tile mortar. Patterns are now laid out on the back of the slab in whatever way leaves the least waste. We cut around the patterns, removed the waste clay to be re-wedged and made again into clay blocks for cutting into slabs. The next step is very important, many of the tiles look quite similar but are not interchangeable, so each tile was stamped on the back with the appropriate pattern number, and this eliminated a lot of confusion later on. The very last step was to carefully remove the green clay tile from the work surface, touch up any imperfections by hand and lay the tiles face up on sheets of drywall to dry.

Comleted tiles

             My potter friend then lent me one of her electric kilns (she did, and still does collect pottery stuff to an alarming degree) I set up the kiln in the garage where I lived and was able to do all the bisque firing in one go. I had to do the glaze firings in several different firings, first because some of the colors I chose needed to be glaze-fired at different temperatures from one another, and second because not all the glazed tiles would fit in one firing without touching one other and thus sticking together.
             At last all the tiles were bisque fired, glazed and glaze-fired, boxed by pattern type, and the boxes numbered and labeled.
             I now thought that the worst was over, it came as something of a surprise therefore when I discovered that the actual process of tiling would take several days and many hands helping in order to complete this project. In fact, it took several months to find a window of opportunity to set the tiles, but the finished hearth met all of my expectations.

Setting the tiles
Completed tiles