Archive for the ‘Creative Process’ Category

Hatches and Hardware

February 12, 2020

When we took over the stewardship of our Friendship sloop the forward hatch was a problem. First and foremost it was not watertight. If a sea came over the bow the hatch let the water run into the forepeak, it did slow the water down a bit, but basically it was only good for keeping the rain out. Secondly it was made of wood with no form of deadlight or port, which meant that the forepeak was a dark cave.

When we redesigned the interior of the boat we put two bunks up in the forepeak and wanted that space to be well lit. The solution we came up with was to build a new hatch that was watertight when closed and dogged down and let in light as well.

We cannibalized an old hatch that we were not going to use and took the large sheet of lexan from the old hatch for the top surface of the new forward hatch.

The first hatch we made

This solution worked well but despite that I was never really happy with it. The lexan that we recycled was already old and pretty scratched but I think what really irked me was that the new hatch while functional, looked really out of place on a traditional boat, sort of like putting a gun-rack in a Prius.

Anyway, a few years ago I decided to build a new hatch that was both functional and more in keeping with the rest of the sloop. I wanted to create a round deadlight in the hatch to let in light but I also wanted the deadlight to be fairly large so that we kept the same sense of light in the forepeak. I ended up with a design that I thought fit the boat aesthetically and allowed plenty of light; I even bought brand new lexan. The problem I ran into was that I could not find a trim ring to fit the size deadlight we had built. For several seasons we used the hatch without a trim ring but it looked unfinished and occasionally the seal between the lexan and the wood part of the hatch would get broken if someone tried to open the hatch from below by pushing up on the lexan.

We had discovered a company called Classic Boat Supplies when we were looking for small oval hawsepipes for our Penny Fee tender. We had tried to find what we needed in the states, but could not. I contacted two of the very few foundries in the states that custom cast bronze but the prices were ridiculous and there would be a six to eight month wait time. I was not going to pay almost $300 plus shipping and wait eight months for a 1inch hawsepipe.

Then I discovered that Classic boat Supplies had a stock pipe that was exactly what we were looking for that cost less than $100 dollars. The drawback was that Classic Boat Supplies is in Australia. To our surprise, they shipped fast and economically provided excellent service. They also seemed to have hardware that we could not find anywhere else. That was certainly the case with the hawsepipes for our tender.

The bow of our Penny Fee showing one of the hawsepipes

I looked through their website for trim rings hoping that they might carry a stock size that matched our new deadlight.

They didn’t.

Sigh…

Then I noticed in the description of the trim rings that they do carry, fine print that said they also will cast trim rings to your specifications. While I figured that it would be way too expensive to have them custom produce what we needed and take too long, I still thought it was worth a shot to contact them. To my surprise, the price was very reasonable and to make a long story short, we had the new custom cast ring within a month of placing the order. I was, and still am, very impressed.

The new hatch with trim ring

The new hatch opened

Our new forward hatch is a better fit all the way around for a traditional boat and once again I was very impressed with the service and quality provided by Classic Boat Supplies, I just wish I did not have to go halfway around the world to find what we needed.

Another illustrated project….

November 29, 2017

I was fortunate to fall into another book project this summer. A friend whose job concerns assessing risk and who is also a mountaineer, became interested in the death of mountaineer Kate Matrosova in 2015. She was fit, had mountaineering experience, and was appropriately equipped, yet died of exposure in an attempted February traverse of the Presidential range in the White Mountains of New Hampshire.

My friend, Ty, wanted to use what we know about Kate’s last climb in a presentation as an analogy to look at how all of us asses risk and make decisions. The presentation was so successful that he asked me if he could hire me to illustrate parts of Kate’s narrative to make the visual parts of the presentation more accessible. The illustrations were challenging. Finding the balance between wanting accurately show what we know about her journey, while maintaining a level of respect for her and her family meant that each illustration caused me to ask myself; okay, how am I going to do this one?

The success of the presentation led to the writing of a book; Where You’ll Find Me, Risk, Decisions, and the uybpw4tkd2dw25s36ugcp0t9klm9hz24Last Climb of Kate Matrosova.

The book required more illustrations as well as maps, which were again a different kind of challenge since the goal for the maps was not just to show on a map where things were but to also give a sense of the kind of terrain to the reader who might not be familiar with the White Mountains, or mountaineering. I enjoyed the project and have been delighted at how well the book has been received.

boufrtoy69hi2l21fnsxitby03yf71hq

In illustration from the book.

If you know someone who hikes or enjoys mountaineering, this might well be a book that they would be interested in.

Boats for HMS Unicorn

January 9, 2015

A year ago when I built the toy ship HMS Unicorn for one of my nephews, I did not know how well it would survive either the interest or the rough handling of a seven-year-old. As it turns out, the Unicorn is still much adored and other than the loss of the horn of the figurehead and the unraveling of one of the anchor rodes, it has survived and is in excellent shape. When I saw the nephew in question early in December he brought out the Unicorn and began to ask all kinds of questions about how 18th Century ships functioned. As we talked it became very clear that HMS Unicorn was in desperate need of ships boats.

“Cutting out expeditions” need ships boats, that house is full of wooden toy ships just begging to be cut out. The sailors need to be able to get to and from the shore, the crew of bears aboard Unicorn has not had shore leave in a year…anyway, it was time to remedy the situation.

As with almost all the toys I make I started with rough sketches drawn to actual size and then shaped the hulls for the ships cutter and jolly boat based on those sketches.

The boats themselves were not that challenging to make, but the crews took a little time. Templates helped speed up the repetitive process of carving the crews for both boats.

The idea was to have each rower positioned such that an oar could either be shipped with the loom in the rowing position,

or the oar could be removed and set in the “oars up” position for coming along side.

The cutter has an officer and coxswain and the jolly boat has a midshipmen in charge. “Away all boats!”

HMS Unicorn

January 22, 2014

While I have been doing a lot of writing in the last eight months or so, it has been for a book and not this blog. It is time, however, to add to the wooden toy category.

I visited with a six-year-old nephew just after Thanksgiving and he was completely obsessed with building a version of HMS Unicorn from one of the TINTIN books.

Since I was only visiting for a few days, there was not time to even start on this project, but it certainly made it easy to figure out what to make him for his Christmas gift.

This will be mostly a photo post, but here are a few particulars and some of the decisions that I needed to make.

First, it appears that the Unicorn in the books is a frigate, a 38, if I remember correctly, and that would be both too much work and too big a toy. So, I went with a 14 gun brig—essentially a sloop of war. This allowed me to keep the scale appropriate for small hands to play with and also make this a project that was manageable over a three-week period.

As I have said before on this site, I like to sketch out ideas in scale and work from there.

Another consideration is that no matter how careful he is, at some point either my nephew or one of his friends, or siblings is going to drop, knock over, or step on this toy, so it had to be built solidly enough to survive.

Starboard side showing the main chains. The wood for the main chains are mortised in to the side of the hull with the grain running across the center line so they won’t break off.

The wood is poplar, a choice that I have had good luck with over the years, inexpensive, readily available, easy to work, and stable.

The guns for the Unicorn have barrels turned on the lathe of and simple carriages made from a piece of “U” channel stock that I made up. To save time the carriages have no wheels, so I suppose they could be technically carronades.

Guns fresh from the lathe, gun ports, and capstan, which turns.

Carronades

I was concerned with the possibility of the masts getting broken off, so the masts are made of thick hardwood dowels and much thought went into how to stay the masts to support them.

In the end I chose to go with the most obvious solution, which is basically how they would be stayed on a real vessel. The dead-eyes took the most time to make, but I could not think of a better way to tighten the stays, and once into production mode, took less time than you might think. The lanyards and dead-eyes made it easy to tighten the stays and make the rig very sturdy.

The wheel took a ridiculously large amount of time to make, but is a key feature so I felt it was worth the three hours invested into it.

Helmsman and wheel with the rigging started.

On the other hand, the figurehead took little time and is also a great detail.

Unicorn has anchors that may be fished and catted over the rail or deployed.

Anchors fished and catted

The rigging took about seven hours spread over a week of evenings and two long sessions in the shop over a weekend.

Sails were made from an old pillowcase that had just the right amount of wear and yellowing to look like canvas. The edges of the sails were sewn so that they would not fray and to make  them less likely to tear, the vertical seams were drawn with a pencil and straight-edge. The actual cutting and stitching of the sails only took a few hours, but bending them on was a more involved task and took more time.

I chose to leave off most of the sheets so that it would be easier for small hands to reach in and play with objects on the deck. Only the masts are rigidly attached to the hull, all other spars are lashed to eyebolts so that they can move. This has two advantages, one being that sails can be trimmed to approximate tacking, running, and heaving-to, the other is that if dropped, or knocked down, the spars and sails twist and move rather than break and tear.

Unicorn caries a compliment of two officers and four crew members, all bears. These pictures were taken before the crew had been varnished.

Lieutenant and captain

Hand going aloft

All deck crew have holes drilled in the bottom of their feet so that they can be set on pegs that stick up in strategic places on decks and in the tops. This way crew can be moved around and set on pegs, but don’t fall over when Unicorn moves.

So there you have it, the good sloop Unicorn.

Wooden Toy Car

April 8, 2013

I have been tied up with a bunch of other projects for the last six months or so and this blog has suffered as a result, but it is time to make up for that. First a toy post:

I have a nephew who just turned six. For some reason he likes old cars. I mean really old cars, as in from the 1920s. So for his birthday he got the touring car below.

The doors and trunk open, and close and the car came with a bear driver and a bear passenger. If you are new to this site you might want to read  “the whole bear thing” for an explanation.

The hood ornament is a bear, and as with the saber jet in the last post, a little acrylic for a windshield adds something to a toy which is otherwise made entirely of wood.

New Boat Part 22

August 13, 2012

Observations:

Before I continue with the building of mast and sail for our new Penny Fee, now called Fee-Fie, (the dinghy has become Foe-Fum), I wanted to record some observations on the performance of the boat thus far. We have had the boat in the water and have been using her for about three weeks. We have used the boat to ferry loads to and from the Friendship sloop, and have towed it to Rockland from Boothbay and back, and have basically rowed it around a bit. As of this weekend we have been sailing it too, but I will save my observations on sailing qualities for the end of this post.

Penny Fee: Fee-Fie

Towing:

The first surprise was how easily she tows behind the Friendship Sloop. She is heavier than our dingy, but she also has a much longer waterline and appears to sit high in the water when unloaded. She also tracks well, partly due to the longer waterline and partly due to the lap-strake construction.  The result is a longer heavier boat that does not squat down in the water behind our sloop but that slips along with less resistance than I would have imagined. Part of our trip back from Rockland was in 5 to 8 foot seas with 15-25 knot winds. We found that in every condition except heavy following seas; this is a very well behaved boat. In following seas she tends to surf and surge and a long towline and a watchful crewmember to tend the towline is advisable.

Rowing:

We have noticed that when under oar power it is more comfortable to sit on a seat cushion that raises up the rower about 2 ½”. I don’t think that this is the result of the benches being placed low, either by the designer or in our construction, but rather that we deliberately raised the height of the oarlocks so that the oars would be less prone to rub on the fender of the boat. She does take more back power and a longer stroke than the dingy to propel, but she carries her way beautifully and once moving is easy to keep moving. The other aspect that will take some getting used to is that she rows a little easier with a load rather than without. This is both the opposite of our dinghy and is also a bit counter-intuitive.

Stability:

Another impressive feature is the stability of the boat, it has greater secondary stability than I would have imagined and, in some ways this drove us to make the sail because we wanted to see how she handled the pressure of the sail and how that effected the stability. We have experimented by having a helmsman stand in the back of the boat and steer with the rudder while the rower provides the power from the front bench. Our experience is that she provides a stable platform for the helmsman, to say nothing of the fact that it is just plain fun to stand in the back of the launch and con the boat.

Now on to the last pieces of construction:

The Mast:

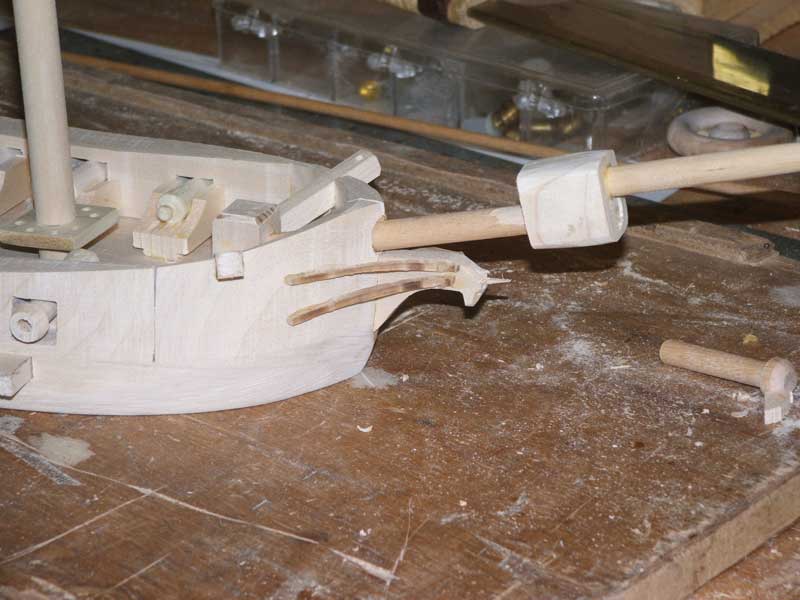
I bought two pieces of 2”x 8” spruce stock that were not flawless but that had long, relatively clear sections in each. I got them at the local home center, total cost was about $20. I then ripped out the two best sections and using a dato-blade on the table saw cut a ¾” channel in each that started a bout a foot below the truck of the mast and ended about a foot above where deck level would be. Then the two halves were glued together giving me essentially a mast blank with a hollow core.

The two mast halves with dato ripped

The two mast halves glued together

When the glue was dry I cut a taper using the table saw so that I had a long, tapered, spar that was square in cross section. Next step, cut off the corners of the square so that the spar becomes eight sided, and then move to hand planes to make the mast round in section.

Mast with taper cut and corners cut off to make a long octagonal spar

Spars varnished and ready for hardware

The sprit is made of solid spruce about 1 ½” in diameter, shaped in the same way that the mast was shaped.

The mast has four, unfinished teak cleats; one each for halyard, brail, snotter, and downhaul. There are two heavy cleats set inside the gunwale, port and starboard aft, for the mainsheet. These too are made from unfinished teak. My experience has been that cleats do not hold finish, due to lines running around them, they are also a pain to keep finished. Raw teak weathers well and always looks pretty good without much care.

Cleats on the mast

Building the sail:

We used as a reference the excellent Sailmaker’s Apprentice, although sailmaking is not new for either me, or the woman who will willingly get up in the middle of the night and stand an anchor watch. It is also worth noting that first, the sprit sail is one of the easier and more forgiving sails to make, and second that we are using canvas that we were given free, so, in many ways this is a prototype sail and we might make a more durable version once we have learned all we can from the performance of this canvas model. On the other hand if this sail works, why fix it?

The sail is made of four panels and will take its shape partly from the cut of these panels (particularly the two closest to the mast) and partly to a slight curve built into the luff of the sail. A bolt-rope is hand stitched along the head, luff and foot of the sail to help minimize the stretch in these sections of the sail. We used 3/8” brass grommets for the reef points and the robands on the luff of the sail, and the brail-line grommet in the leach of the sail. The rest of the sail hardware is sewn in by hand. The thimbles and metal rings are all solid brass.

The building process:

One thing we did that made the whole sailmaking process much easier was to recycle the boatbuilding table and use it as a sailmaking table. All we did was cut the table in half into two eight-foot sections. This allowed us to either push the sections together and make one long table to lay out panels and pin seams and that kind of thing, or we could pull the two apart and put the sewing machine in between them and pass the sail from one surface to the other over the sewing machine table. If we were making a larger sail I would have raise the levels of the tales to the same level as the sewing machine table, but with a sail that is only 85 square feet it seemed unnecessary.

Work table with sewing machine in the middle, sail in the foreground

The sail took about two weeks to build working in the evenings and in what free time we have, but I would not want to be misleading about this. As I said before both the woman who will willingly get up in the middle of the night and stand an anchor watch, and I have sailmaking experience, added to which I have a fairly comprehensive collection of sailmaking tools and supplies on hand. It would be a different story if we were having to figure out each step from scratch and then purchase the appropriate tools, materials and hardware. As it was there where plenty of choices to make regarding where to put in grommets, cringles, and thimbles.

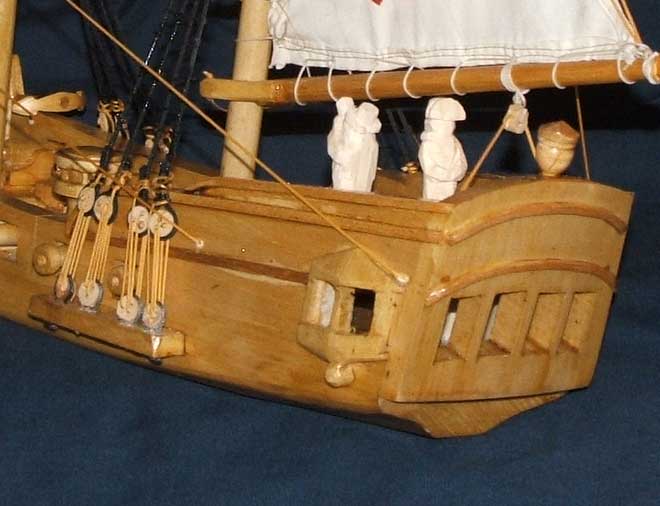
Details of the sail showing the hand-sewn hardware at the clew and head

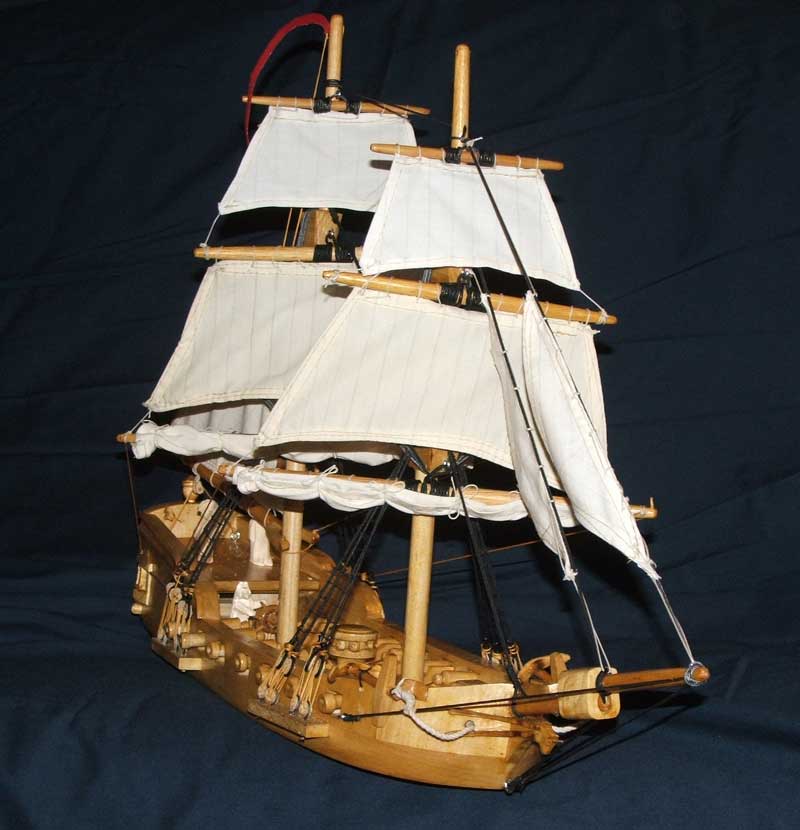
Anyway the finished sail looked great, the question was how would it perform in collaboration with the Penny Fee? The short answer is: far better than I expected.

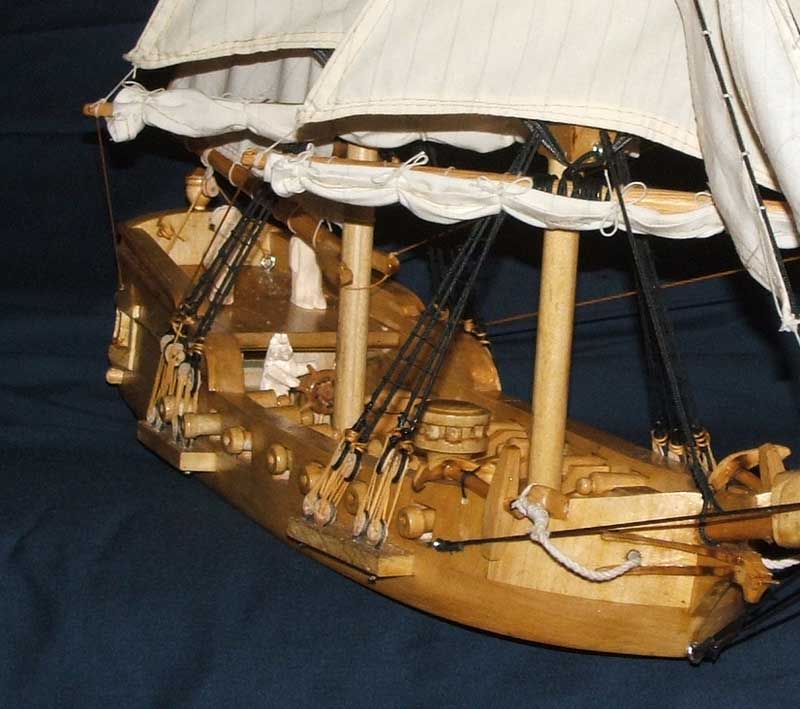
Penny Fee under sail

This shot shows the boat well

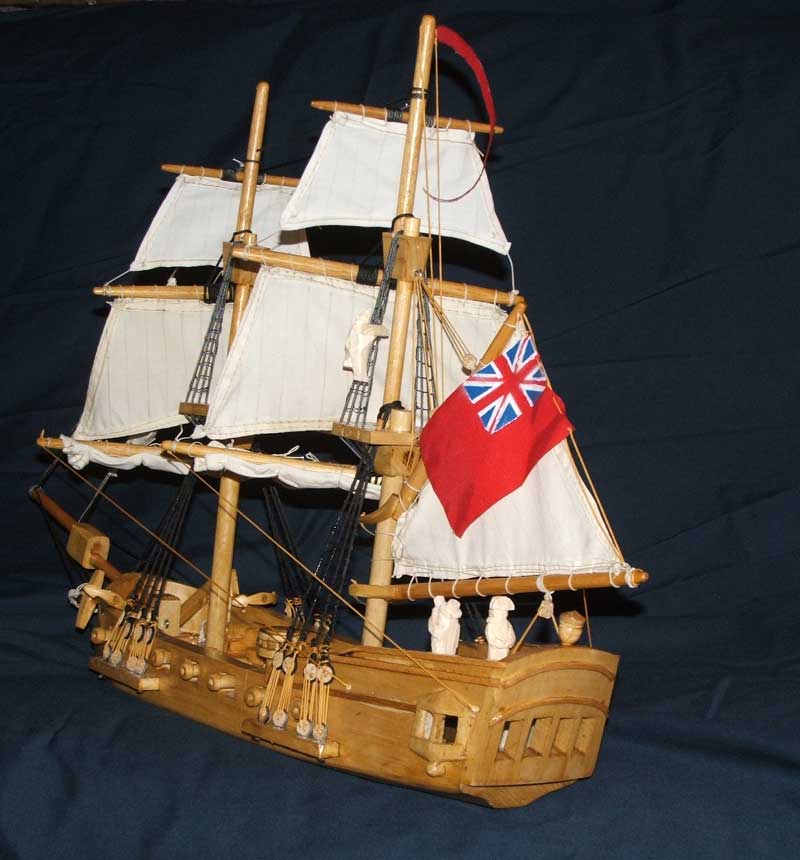
Sailing in light air

There is a tendency to make leeway with very light air, but that disappears when there is any real wind. The boat points higher than I thought it would and virtually flies downwind. Beam reaching it is remarkably stable. The other factor that I love about this rig is how easy it is to haul on the brailing line and collapse the sail and sprit against the mast. It was really fun to sail right up alongside the Friendship sloop, touch the side, and collapse the rig by pulling on one line.

Sail brailed up against the mast

The two aspects of the rig that I question at this point have to do with the mast and the foot of the sail. I went to great effort (explained above) to make the mast hollow and light, it now appears that that was not necessary and that it may in fact be a weakness, because the mast does flex alarmingly in strong gusts. However, if the mast breaks it will be easy and inexpensive to replace. My concern about the foot of the sail is simply that now that we have seen the sail and how it takes shape in the wind, I think we could have easily added twelve to fourteen inches of length to the foot of the sail and gotten her to round up a little faster when tacking.

In both these cases, however, I am splitting hairs and speculating. The factual evidence that we have so far is that this is an easy rig to sail, to break down and set up. It brails quickly so that if the wind dies you can row without taking down the rig, and you can dowse the sail quickly when coming alongside. In short, it is everything we had hoped for and we had a fantastic fun day testing it out.

Really fun to sail

If you would like to read all the posts related to this project together, go to the category at the right called “Penny Fee” and click on it. It will pull all the posts on the penny fee onto one page for you.

New Boat Part 14

January 19, 2012

The inwales:

With all that has been going on this fall and winter, it has been very difficult to find any time to work on the Penny Fee. However, we still managed to get one or two things done. We have been working on finishing the gunwales. In order to do this we needed to make up both the breasthook and the transom knees that connect the inwales to the structure at the stem and to the transom. All three pieces are made from 6/4 white oak. The breasthook is made of two matched pieces that are splined together. We glued these in and backed up the glue with bronze fastenings.

breasthook

Transom knees with inwales in place

The outwales, which we installed last summer and were described in an earlier post, were glued to the outside top edge of the sheer strake. The inwales are glued to the inside edge of the sheer strake. The three parts together, outwale, sheer strake, and inwale, collectively make up the gunwale.

We wanted inwales that have spacer blocks, and the best way that I know of to get a symmetrical set was to glue the two strips that form the inner face of the gunwales  and spacers into one unit: sort of like a very narrow ladder.

The narrow ladder

Then, when the glue dried, rip the single unit into the two respective, matched inwales.

Dry fit of inwales

This done we dry-fitted the whole together. There was a long interval between the dry fitting and finally getting to do the gluing, but eventually we got it done. As with every other step in glued-epoxy-construction, we spent almost as much time taping off areas and scraping and cleaning the glue that was squeezed out by the clamps as we did making the parts to be glued.

Gluing in the inwales

With gunwales installed the boat is much stiffer and I feel better about getting into the boat to finish the glue clean up.

Finished gunwales

If you would like to read all the posts related to this project together, go to the category at the right called “Penny Fee” and click on it. It will pull all the posts on the penny fee onto one page for you.


More Wooden Toys…

January 4, 2012

Happy New Year.

Having now survived the rather frantic run up to the holidays, I can share a few more wooden toys that I made to give to family.

I have four-year-old nephew who is a fireman (at least that is what he tells me). He goes everywhere in turnout gear and helmet, and is often talking on a plastic handheld VHF radio—I believe it is a toy, at least no one has answered him yet on it. Clearly a fire truck was in order:

As with most of my toys, the crew for the truck is made up of bears.

Another nephew has a fascination with the Trojan Wars. This year I made him a toy acropolis. Admittedly it is from a later period than the actual Mycenean, but I could not resist the challenge of making an early Doric temple. And the truth is that at least half the fun of making toys is trying to come up with ideas that are fresh and unusual.

Over the years this nephew has acquired quite a collection of Greek and Trojan toys. Some of the collection can bee seen here.

The Trojan Horse was in another room, and it turned out that several squads of Greeks were hiding in the hull of a toy arc, given to a different nephew…sneaky.

Winter is here!

January 7, 2011

Winter is certainly here, and you never know what it will bring…

Run little snowmen! Run!

Another Toy Lobster Boat

December 31, 2010

With the holidays here, I have made additions to the toy fleets of my nephews. Here is another toy lobster boat. This one an evolution between the Hampton type and the Razor Case type, with a torpedo stern. More typical of the 1920s, it is a simple but elegant craft, simple enough for a singe bear to handle. As with the toy razor Case, it comes with traps.

Since available working waterfront is always an issues for lobstermen, or lobsterbears, another related toy is the dock that goes with the two toy lobster boats. It provides a place for the two boats to tie up, stack traps and bait barrels, and store extra gear.